Use GitHub Actions to Build GraalVM Native Images
Getting something to work is one of the greatest feelings you can have as a developer. Especially when you’ve spent hours, days, or months trying to make it happen. The last mile can be one of the most painful and rewarding experiences, all wrapped into the same day or two.
I experienced this recently with Spring Native for JHipster. If I look back, it took a year’s worth of desire, research, and perseverance to make it happen. When we finally got it working—and automated—you can imagine my excitement!
After a few days of euphoria, I thought it’d be easy to create native builds for each operating system (Linux, macOS, and Windows) using GitHub Actions. I was wrong.
If you’d like to follow along and learn how to configure GitHub Actions to create native binaries, you’ll need a few prerequisites.
Note: In May 2025, the Okta Integrator Free Plan replaced Okta Developer Edition Accounts, and the Okta CLI was deprecated.
We preserved this post for reference, but the instructions no longer work exactly as written. Replace the Okta CLI commands by manually configuring Okta following the instructions in our Developer Documentation.
Prerequisites:
- Configure a JHipster app to use GitHub Actions
- Automate the wait with JHipster’s CI/CD
- The environmental impact of GraalVM builds
- Best Practices for GraalVM with GitHub Actions
- Run nightly tests with GraalVM and GitHub Actions
- How to build and upload native binaries when releasing on GitHub
- Run your released binaries locally
- Learn more about CI, JHipster, and GraalVM
You can read the full conversation (aka a condensed version of this post) via the tweet below, or keep reading to walk through the trials and tribulations I experienced with GitHub Actions and GraalVM. Hopefully, my learnings will save you hours of time.
I was so excited when I got this working last week, I decided to explore getting @graalvm builds working with GitHub Actions.
— Matt Raible (@mraible) February 23, 2022
The experience has been slow and painful.
Current status: it only works on macOS.
Windows says the command is too long and Linux runs out of memory. https://t.co/sfLWQCVzaY
Configure a JHipster app to use GitHub Actions
I’m going to speed things up for you and just show you how to configure GitHub Actions for an existing JHipster app. In this case, it’s a full-stack React + Spring Boot app.
If you’d like a bit more background, please read Full Stack Java with React, Spring Boot, and JHipster followed by Introducing Spring Native for JHipster.
Clone the result of these two blog posts, right after I integrated the JHipster Native blueprint. Install its dependencies using npm.
git clone -b jhipster-native-1.1.2 \
  https://github.com/oktadev/auth0-full-stack-java-example.git flickr2
cd flickr2
npm install
Then, create a new repo on GitHub. For example, jhipster-flickr2.
Next, push this example project to it.
USERNAME=<your-github-username>
git remote rm origin
git remote add origin git@github.com:${USERNAME}/jhipster-flickr2.git
git branch -M main
git push -u origin main
Automate the wait with JHipster’s CI/CD
Building native images with GraalVM brings me back to the days when we’d build Java apps with Ant and XDoclet in the early 2000s. We’d start the build and go do something else for a while because it took several minutes for the artifact to be built.
Another often-overlooked issue with native binaries is that you have to build one for each operating system. It’s not like Java, where you can build a JAR (Java ARchive) and run it anywhere.
Next, generate continuous integration (CI) workflows using JHipster’s CI/CD sub-generator.
npx jhipster ci-cdThis command will prompt you to select a CI/CD pipeline. Select GitHub Actions.
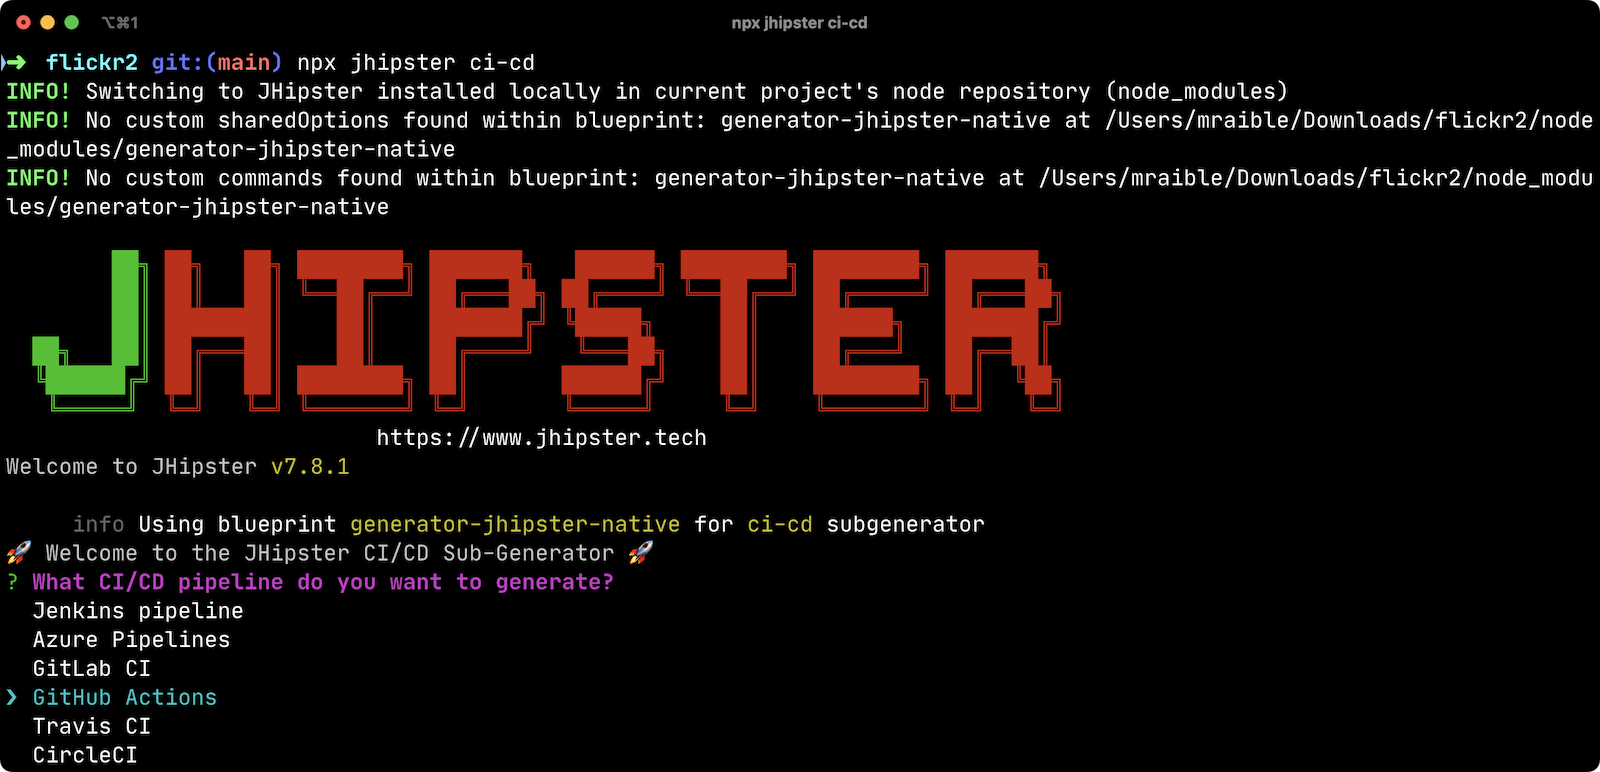
When prompted for the tasks/integrations for this quick example (Sonar, Docker, Snyk, Heroku, and Cypress Dashboard), don’t select any. The sub-generator will create three files:
-
.github/workflows/main.yml -
.github/workflows/native.yml -
.github/workflows/native-artifact.yml
I’ll show you what each file contains in the sections below. Let’s start by examining main.yml.
The main.yml workflow file configures GitHub Actions to check out your project, configure Node 16, configure Java 11, run your project’s backend/frontend unit tests, and run its end-to-end tests. Not only that, it’ll start your dependent containers (e.g., Keycloak) in Docker. You can see that most of this functionality is hidden behind npm run commands.
name: Application CI
on: [push, pull_request]
jobs:
  pipeline:
    name: flickr2 pipeline
    runs-on: ubuntu-latest
    if: "!contains(github.event.head_commit.message, '[ci skip]') && !contains(github.event.head_commit.message, '[skip ci]') && !contains(github.event.pull_request.title, '[skip ci]') && !contains(github.event.pull_request.title, '[ci skip]')"
    timeout-minutes: 40
    env:
      NODE_VERSION: 16.14.0
      SPRING_OUTPUT_ANSI_ENABLED: DETECT
      SPRING_JPA_SHOW_SQL: false
      JHI_DISABLE_WEBPACK_LOGS: true
    steps:
      - uses: actions/checkout@v3
      - uses: actions/setup-node@v3
        with:
          node-version: 16.14.0
      - uses: actions/setup-java@v3
        with:
          distribution: 'temurin'
          java-version: 11
      - name: Install node.js packages
        run: npm install
      - name: Run backend test
        run: |
          chmod +x mvnw
          npm run ci:backend:test
      - name: Run frontend test
        run: npm run ci:frontend:test
      - name: Package application
        run: npm run java:jar:prod
      - name: 'E2E: Package'
        run: npm run ci:e2e:package
      - name: 'E2E: Prepare'
        run: npm run ci:e2e:prepare
      - name: 'E2E: Run'
        run: npm run ci:e2e:run
        env:
          CYPRESS_ENABLE_RECORD: false
          CYPRESS_PROJECT_ID: ${{ secrets.CYPRESS_PROJECT_ID }}
          CYPRESS_RECORD_KEY: ${{ secrets.CYPRESS_RECORD_KEY }}
      - name: 'E2E: Teardown'
        run: npm run ci:e2e:teardown
To test this out on your new repository, you’ll need to create a branch and pull request (PR) with your changes.
git checkout -b actions
git add .
git commit -m "Add GitHub Actions"
git push origin actions
You should see a link in your terminal to create a pull request (PR).
remote: Create a pull request for 'actions' on GitHub by visiting:
remote:      https://github.com/mraible/jhipster-flickr2/pull/new/actions
If you watch the tests run from your PR, you’ll be pretty pleased until it hits the E2E: Package phase. It’ll likely fail with the following error:
Found orphan containers (docker_keycloak_1) for this project. If you removed or renamed
this service in your compose file, you can run this command with the --remove-orphans flag
to clean it up.
I reported this issue in JHipster since --remove-orphans was recently removed from the docker:db:down and docker:keycloak:down commands. The explanation provided enough information for me to close the issue. Add them back into package.json as a workaround.
"scripts": {
  ...
  "docker:db:down": "... --remove-orphans",
  ...
  "docker:keycloak:down": "... --remove-orphans",
  ...
}
Commit and push these changes. Now everything should pass.
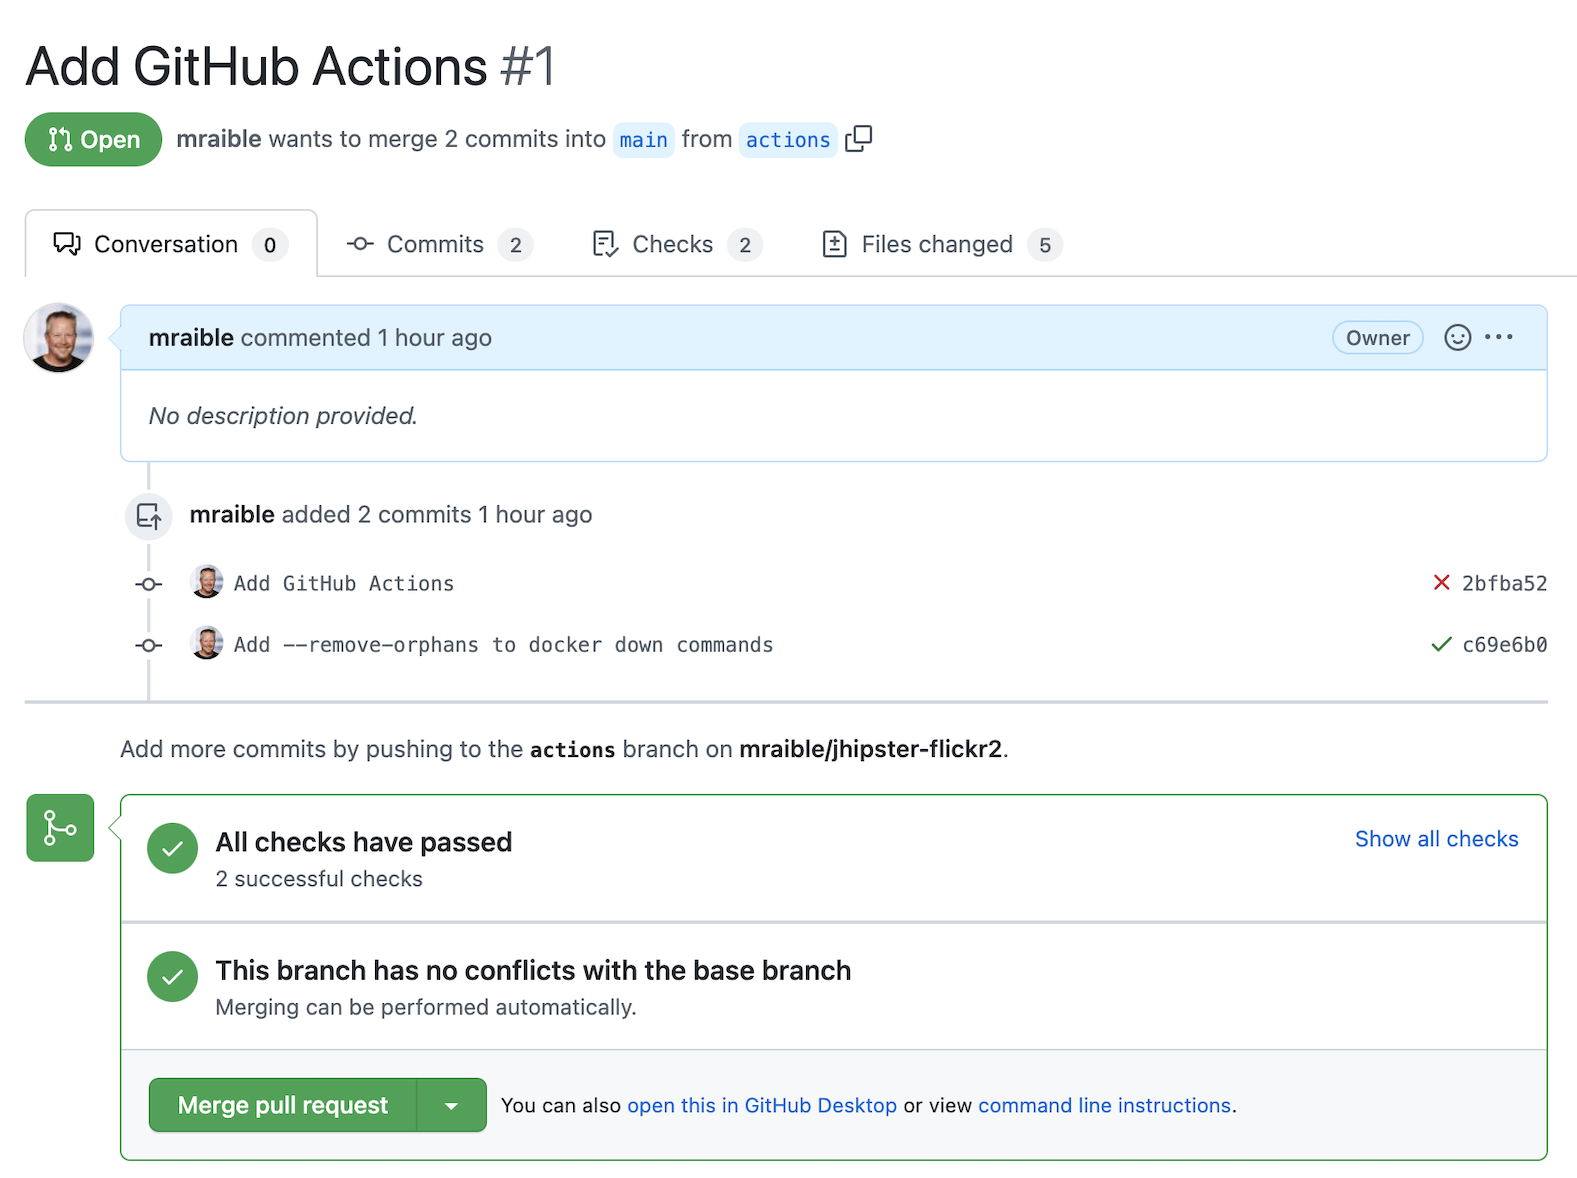
Merge this PR into the main branch.
The environmental impact of GraalVM builds
This brings us to an interesting dilemma. If you’re creating native images as your application’s distribution artifact, shouldn’t you use the setup-graalvm action to configure GraalVM and your Java SDK?
I don’t think so. If you do, every time you create a PR and commit to it, it will run a native build. A GraalVM build of this project takes 3-4 minutes for me locally. With GitHub Actions, it takes 30+ minutes!
To me, this seems as bad for the environment as cryptocurrency. If you’re using a private repo, it’ll also make you wish you bought crypto several years ago. You only get 2000 free minutes of GitHub Actions for private repos. Any minutes after that, you get charged for.
Yes, I know the cryptocurrency topic is controversial. I do like to poke fun at it though. Native builds on every commit and mining bitcoin seem similar to me. Then again, simply surfing the web is terrible for the environment too.
Best Practices for GraalVM with GitHub Actions
When I first started investigating GitHub Actions for GraalVM, the JHipster Native blueprint modified commands in package.json to always build native images and to use them when running end-to-end tests. This meant that when you first tried to add GitHub Actions support, the build would fail because GRAALVM_HOME wasn’t found. To solve this, you could switch from actions/setup-java to graalvm/setup-graalvm, but that’s not very environmentally sustainable.
Since then, we’ve modified the blueprint to generate two new workflows that reflect (in my opinion) best practices for GitHub Actions and GraalVM.
-
native.yml: run nightly tests at midnight using GraalVM -
native-artifact.yml: builds and uploads native binaries for releases
The main.yml stays the same as JHipster’s default and continuously tests on the JVM.
Run nightly tests with GraalVM and GitHub Actions
The native.yml workflow file performs similar actions to main.yml, but with GraalVM. It runs on a schedule every day at midnight UTC. Adding a timezone is currently not supported.
name: Native CI
on:
  workflow_dispatch:
  schedule:
    - cron: '0 0 * * *'
permissions:
  contents: read
jobs:
  pipeline:
    name: flickr2 native pipeline
    runs-on: ${{ matrix.os }}
    if: "!contains(github.event.head_commit.message, '[ci skip]') && !contains(github.event.head_commit.message, '[skip ci]') && !contains(github.event.pull_request.title, '[skip ci]') && !contains(github.event.pull_request.title, '[ci skip]')"
    timeout-minutes: 90
    env:
      SPRING_OUTPUT_ANSI_ENABLED: DETECT
      SPRING_JPA_SHOW_SQL: false
      JHI_DISABLE_WEBPACK_LOGS: true
    defaults:
      run:
        shell: bash
    strategy:
      fail-fast: false
      matrix:
        os: [ubuntu-latest, macos-latest, windows-2019]
        graalvm-version: ['22.0.0.2']
        java-version: ['11']
        include:
          - os: ubuntu-latest
            executable-suffix: ''
            native-build-args: --verbose -J-Xmx10g
          - os: macos-latest
            executable-suffix: ''
            native-build-args: --verbose -J-Xmx13g
          - os: windows-2019
            executable-suffix: '.exe'
            # e2e is disabled due to unstable docker step
            e2e: false
            native-build-args: --verbose -J-Xmx10g
    steps:
      # OS customizations that allow the builds to succeed on Linux and Windows.
      # Using hash for better security due to third party actions.
      - name: Set up swap space
        if: runner.os == 'Linux'
        # v1.0 (49819abfb41bd9b44fb781159c033dba90353a7c)
        uses: pierotofy/set-swap-space@49819abfb41bd9b44fb781159c033dba90353a7c
        with:
          swap-size-gb: 10
      - name:
          Configure pagefile
          # v1.2 (7e234852c937eea04d6ee627c599fb24a5bfffee)
        uses: al-cheb/configure-pagefile-action@7e234852c937eea04d6ee627c599fb24a5bfffee
        if: runner.os == 'Windows'
        with:
          minimum-size: 10GB
          maximum-size: 12GB
      - name: Set up pagefile
        if: runner.os == 'Windows'
        run: |
          (Get-CimInstance Win32_PageFileUsage).AllocatedBaseSize
        shell: pwsh
      - name: 'SETUP: docker'
        run: |
          HOMEBREW_NO_AUTO_UPDATE=1 brew install --cask docker
          sudo /Applications/Docker.app/Contents/MacOS/Docker --unattended --install-privileged-components
          open -a /Applications/Docker.app --args --unattended --accept-license
          #echo "We are waiting for Docker to be up and running. It can take over 2 minutes..."
          #while ! /Applications/Docker.app/Contents/Resources/bin/docker info &>/dev/null; do sleep 1; done
        if: runner.os == 'macOS'

      - uses: actions/checkout@v3
      - uses: actions/setup-node@v3
        with:
          node-version: 16.14.0
      - name: Set up GraalVM (Java ${{ matrix.java-version }})
        uses: graalvm/setup-graalvm@v1
        with:
          version: '${{ matrix.graalvm-version }}'
          java-version: '${{ matrix.java-version }}'
          components: 'native-image'
          github-token: ${{ secrets.GITHUB_TOKEN }}
      - name: Cache Maven dependencies
        uses: actions/cache@v3
        with:
          path: ~/.m2/repository
          key: ${{ runner.os }}-maven-${{ hashFiles('**/pom.xml') }}
          restore-keys: ${{ runner.os }}-maven
      - name: Cache npm dependencies
        uses: actions/cache@v3
        with:
          path: ~/.npm
          key: ${{ runner.os }}-npm-${{ hashFiles('**/package-lock.json') }}
      - name: Install node.js packages
        run: npm install
      - name: 'E2E: Package'
        run: npm run native-package -- -B -ntp "-Dnative-build-args=${{ matrix.native-build-args }}"
      - name: 'E2E: Prepare'
        if: matrix.e2e != false
        run: npm run ci:e2e:prepare
      - name: 'E2E: Run'
        if: matrix.e2e != false
        run: npm run native-e2e
If you compare native.yml with main.yml, you’ll see it doesn’t run unit tests (because Spring Native doesn’t support Mockito yet). It does build a native executable and runs end-to-end tests against it.
If you wait until after midnight UTC, you can view this workflow’s results in your repo’s Actions tab. It also has a workflow_dispatch event trigger, so you can trigger it manually from your browser.
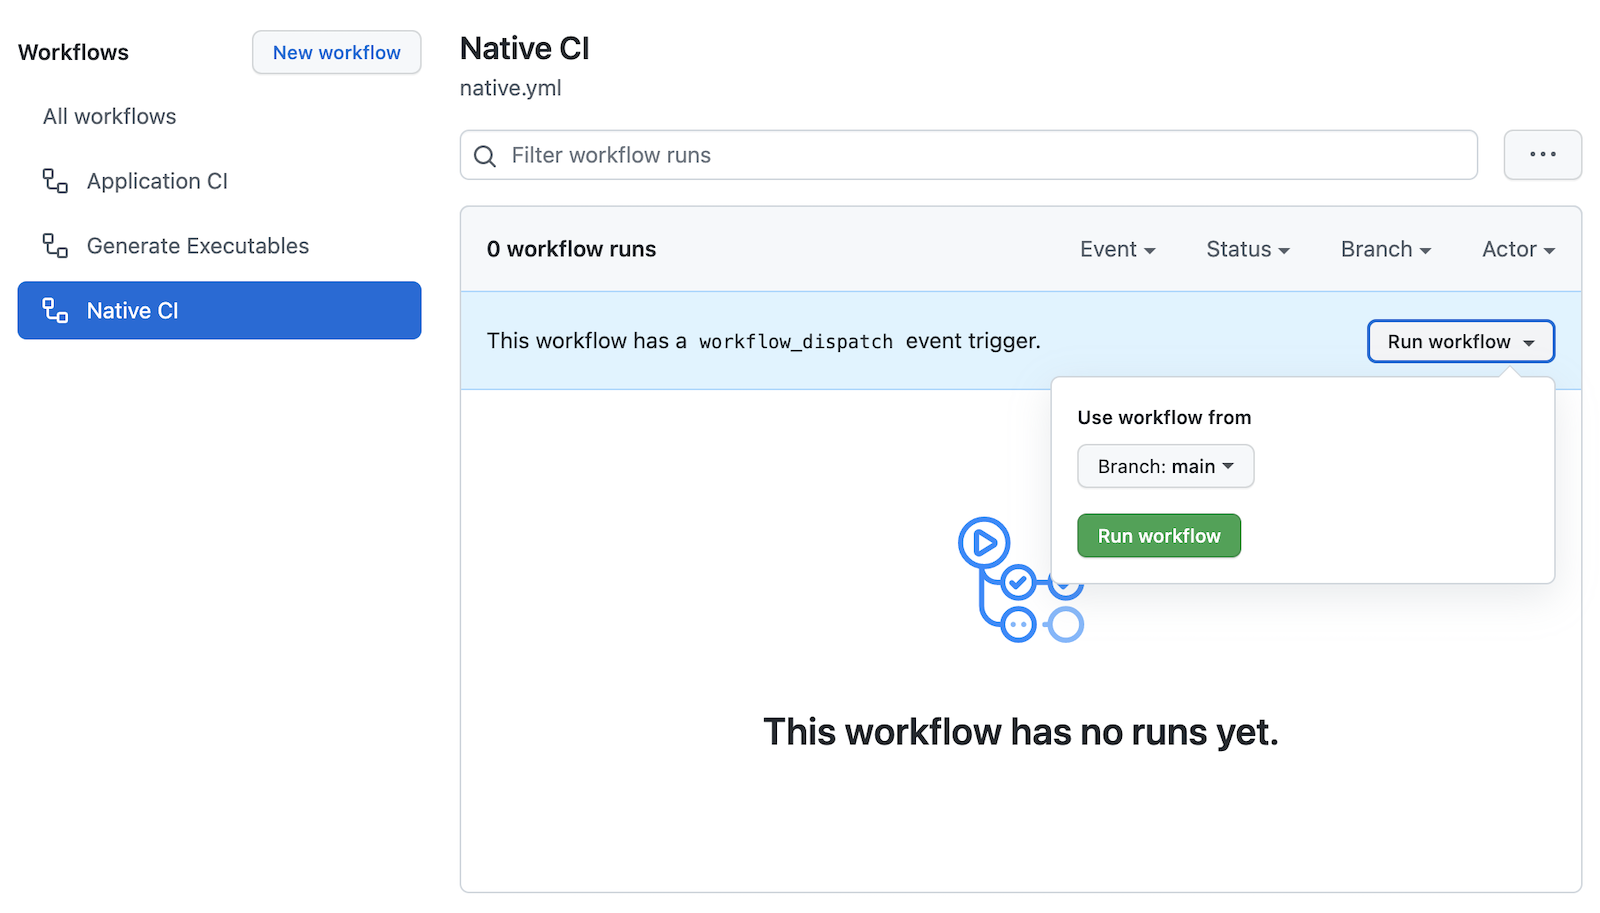
| The end-to-end tests are currently disabled for Windows because Docker images fail to start. |
How to build and upload native binaries when releasing on GitHub
The native-artifact.yml workflow file creates binaries for macOS, Linux, and Windows when a release is created. This workflow configures Linux and Windows to have enough memory, uploads artifacts to the actions job, and uploads the native binaries to the release on GitHub. It will only execute when you create a release (aka a tag).
name: Generate Executables
on:
  workflow_dispatch:
  release:
    types: [published]
permissions:
  contents: write
jobs:
  build:
    name: Generate executable - ${{ matrix.os }}
    runs-on: ${{ matrix.os }}
    timeout-minutes: 90
    defaults:
      run:
        shell: bash
    strategy:
      fail-fast: false
      matrix:
        os: [ubuntu-latest, macos-latest, windows-2019]
        graalvm-version: ['22.0.0.2']
        java-version: ['11']
        include:
          - os: ubuntu-latest
            executable-suffix: ''
            native-build-args: --verbose -J-Xmx10g
          - os: macos-latest
            executable-suffix: ''
            native-build-args: --verbose -J-Xmx13g
          - os: windows-2019
            executable-suffix: '.exe'
            native-build-args: --verbose -J-Xmx10g
    steps:
      # OS customizations that allow the builds to succeed on Linux and Windows.
      # Using hash for better security due to third party actions.
      - name: Set up swap space
        if: runner.os == 'Linux'
        # v1.0 (49819abfb41bd9b44fb781159c033dba90353a7c)
        uses: pierotofy/set-swap-space@49819abfb41bd9b44fb781159c033dba90353a7c
        with:
          swap-size-gb: 10
      - name:
          Configure pagefile
          # v1.2 (7e234852c937eea04d6ee627c599fb24a5bfffee)
        uses: al-cheb/configure-pagefile-action@7e234852c937eea04d6ee627c599fb24a5bfffee
        if: runner.os == 'Windows'
        with:
          minimum-size: 10GB
          maximum-size: 12GB
      - name: Set up pagefile
        if: runner.os == 'Windows'
        run: |
          (Get-CimInstance Win32_PageFileUsage).AllocatedBaseSize
        shell: pwsh

      - uses: actions/checkout@v3
      - id: executable
        run: echo "::set-output name=name::flickr2-${{ runner.os }}-${{ github.event.release.tag_name || 'snapshot' }}-x86_64"
      - uses: actions/setup-node@v3
        with:
          node-version: 16.14.0
      - name: Set up GraalVM (Java ${{ matrix.java-version }})
        uses: graalvm/setup-graalvm@v1
        with:
          version: '${{ matrix.graalvm-version }}'
          java-version: '${{ matrix.java-version }}'
          components: 'native-image'
          github-token: ${{ secrets.GITHUB_TOKEN }}
      - name: Cache Maven dependencies
        uses: actions/cache@v3
        with:
          path: ~/.m2/repository
          key: ${{ runner.os }}-maven-${{ hashFiles('**/pom.xml') }}
          restore-keys: ${{ runner.os }}-maven
      - name: Cache npm dependencies
        uses: actions/cache@v3
        with:
          path: ~/.npm
          key: ${{ runner.os }}-npm-${{ hashFiles('**/package-lock.json') }}
      - run: npm install
      - name: Build ${{ steps.executable.outputs.name }} native image
        run: npm run native-package -- -B -ntp "-Dnative-image-name=${{ steps.executable.outputs.name }}" "-Dnative-build-args=${{ matrix.native-build-args }}"
      - name: Archive binary
        uses: actions/upload-artifact@v3
        with:
          name: ${{ steps.executable.outputs.name }}
          path: target/${{ steps.executable.outputs.name }}${{ matrix.executable-suffix }}
      - name: Upload release
        if: github.event.release.tag_name
        run: gh release upload ${{ github.event.release.tag_name }} target/${{ steps.executable.outputs.name }}${{ matrix.executable-suffix }}
        env:
          GITHUB_TOKEN: ${{ secrets.GITHUB_TOKEN }}
Linux and Windows problems and solutions
When I first started trying to build native binaries with GraalVM, I quickly ran into issues on Linux and Windows:
-
Linux:
java.lang.OutOfMemoryError: GC overhead limit exceeded -
Windows:
The command line is too long.
I’m happy to say that I was able to fix the OOM error on Linux by specifying -J-Xmx10g in the build arguments of the native-maven-plugin plugin. JHipster Native now configures this setting by default and optimizes it for your OS when building native artifacts.
<native-image-name>native-executable</native-image-name>
<native-build-args>--verbose -J-Xmx10g</native-build-args>
...
<plugin>
    <groupId>org.graalvm.buildtools</groupId>
    <artifactId>native-maven-plugin</artifactId>
    ..
    <configuration>
        <imageName>${native-image-name}</imageName>
        <buildArgs>
            <buildArg>--no-fallback ${native-build-args}</buildArg>
        </buildArgs>
    </configuration>
</plugin>
The Windows issue was fixed by native build tools 0.9.10.
We use windows-2019 instead of windows-latest because I ran out of disk space when I tried it.
Publish a release on GitHub
Open your repository’s page in your favorite browser and click Create a new release. Create a new v0.0.1 tag, title the release v0.0.1, and add some fun text in the description. Click Publish release.
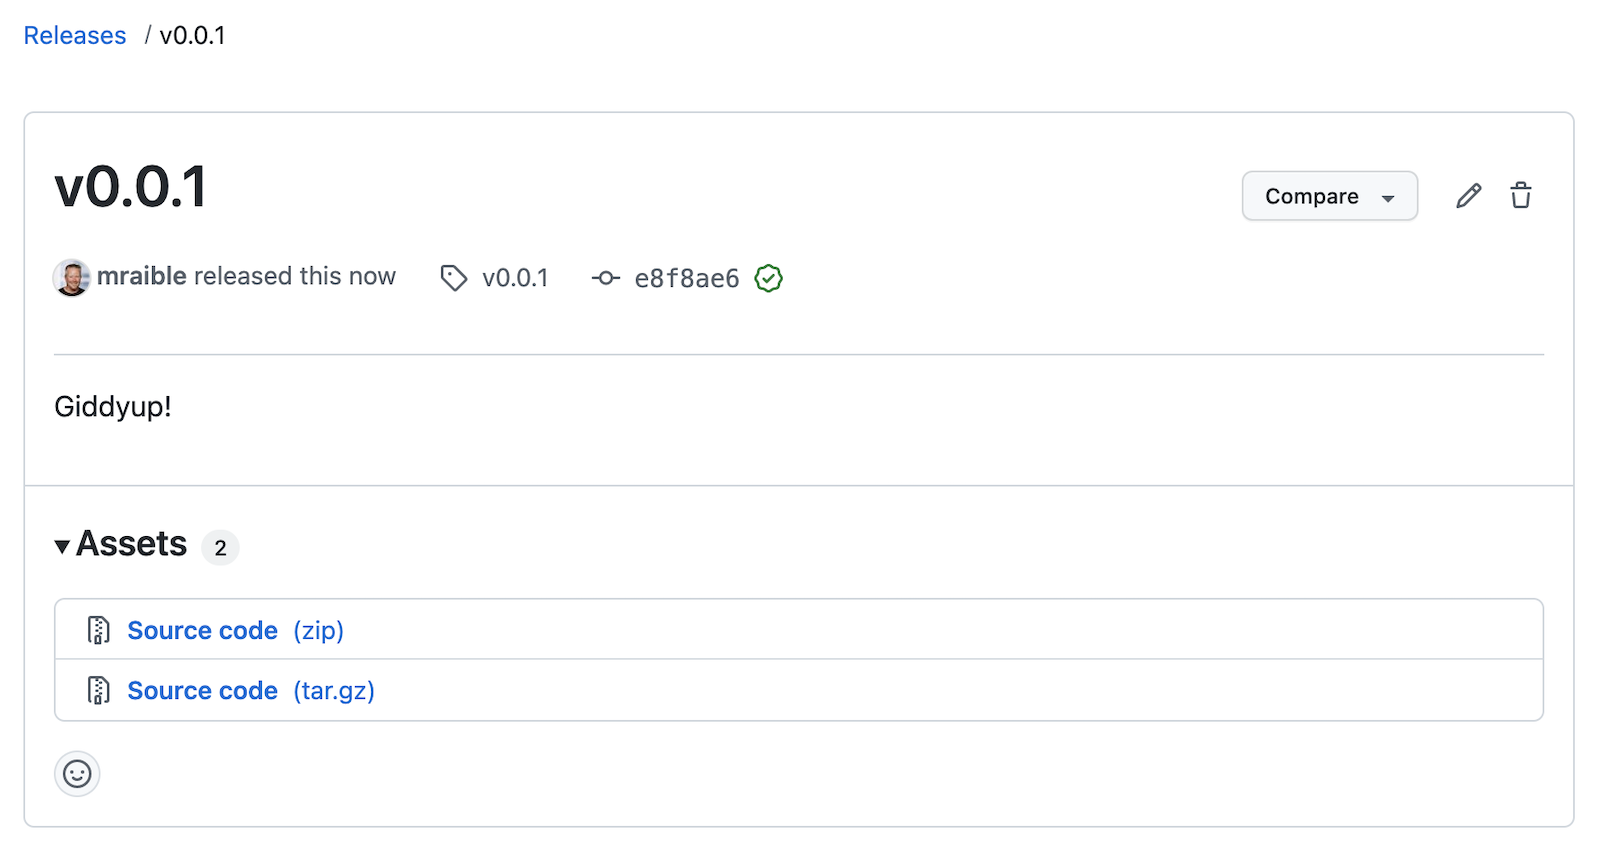
Click the Actions tab to watch your release execute. I want to warn you though, it’s gonna take a while! My first successful release took just under an hour.
-
macOS: 31m 30s
-
Linux: 33m 50s
-
Windows: 59m 45s
I think you’ll be pleased with the results. 🤠
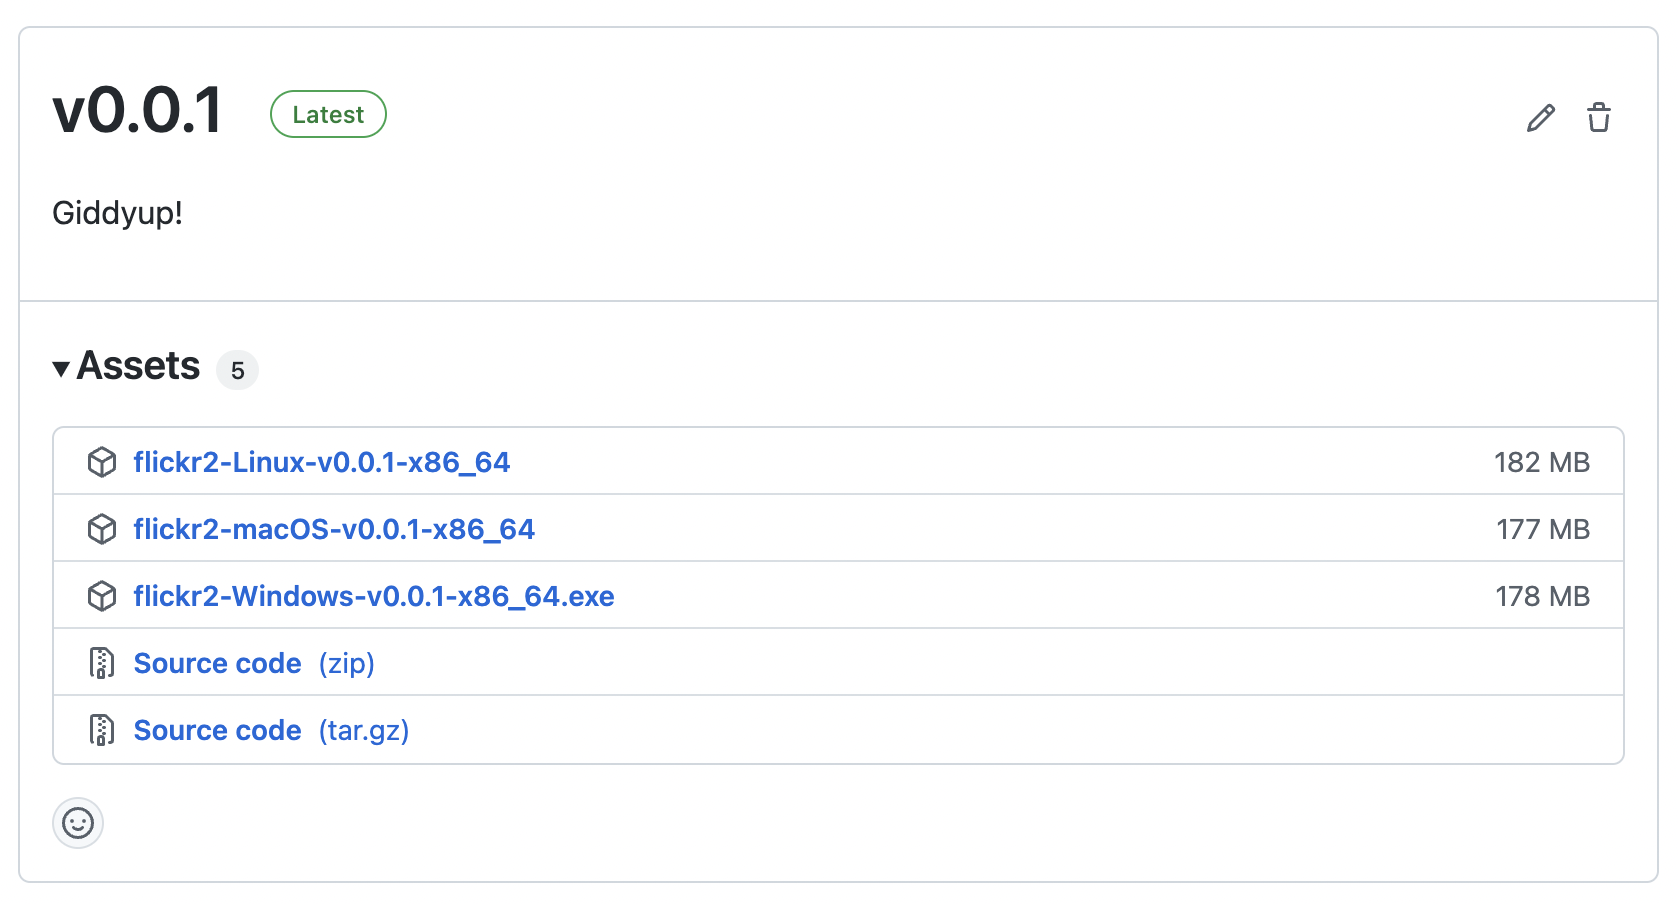
If your builds fail, you can delete the tag for the release by running git push origin :v0.0.1. Your release will then become a draft, and you can easily create the release again using the GitHub UI.
|
Run your released binaries locally
If you were to download these binaries from GitHub and try to run them locally, you’d get failures because they can’t connect to instances of Keycloak or PostgreSQL.
To start up a PostgreSQL database for the app to talk to, you can run the following command from your flickr2 directory.
docker-compose -f src/main/docker/postgresql.yml up -dYou could do the same for Keycloak:
docker-compose -f src/main/docker/keycloak.yml up -dThe Okta CLI makes it so easy, you can do it in minutes.
Before you begin, you’ll need a free Okta developer account. Install the Okta CLI and run okta register to sign up for a new account. If you already have an account, run okta login.
Then, run okta apps create jhipster. Select the default app name, or change it as you see fit.
Accept the default Redirect URI values provided for you.
What does the Okta CLI do?
The Okta CLI streamlines configuring a JHipster app and does several things for you:
- Creates an OIDC app with the correct redirect URIs:
- login:
http://localhost:8080/login/oauth2/code/oidcandhttp://localhost:8761/login/oauth2/code/oidc - logout:
http://localhost:8080andhttp://localhost:8761
- login:
- Creates
ROLE_ADMINandROLE_USERgroups that JHipster expects - Adds your current user to the
ROLE_ADMINandROLE_USERgroups - Creates a
groupsclaim in your default authorization server and adds the user’s groups to it
NOTE: The http://localhost:8761* redirect URIs are for the JHipster Registry, which is often used when creating microservices with JHipster. The Okta CLI adds these by default.
You will see output like the following when it’s finished:
Okta application configuration has been written to: /path/to/app/.okta.env
Run cat .okta.env (or type .okta.env on Windows) to see the issuer and credentials for your app. It will look like this (except the placeholder values will be populated):
export SPRING_SECURITY_OAUTH2_CLIENT_PROVIDER_OIDC_ISSUER_URI="https://{yourOktaDomain}/oauth2/default"
export SPRING_SECURITY_OAUTH2_CLIENT_REGISTRATION_OIDC_CLIENT_ID="{clientId}"
export SPRING_SECURITY_OAUTH2_CLIENT_REGISTRATION_OIDC_CLIENT_SECRET="{clientSecret}"
NOTE: You can also use the Okta Admin Console to create your app. See Create a JHipster App on Okta for more information.
Then, start the app by setting the environment variables from .okta.env and executing the binary. For example:
source .okta.env
chmod +x flickr2-macOS-v0.0.1-x86_64
./flickr2-macOS-v0.0.1-x86_64
# verify in System Preferences > Security & Privacy and run again
If you’re on Windows, you may need to install the Windows Subsystem for Linux for these commands to succeed. Or, you can rename .okta.env to okta.bat and change export to set in the file. Then, run it from your terminal to set the variables.
|
Everything should work as expected. Pretty slick, don’t you think?
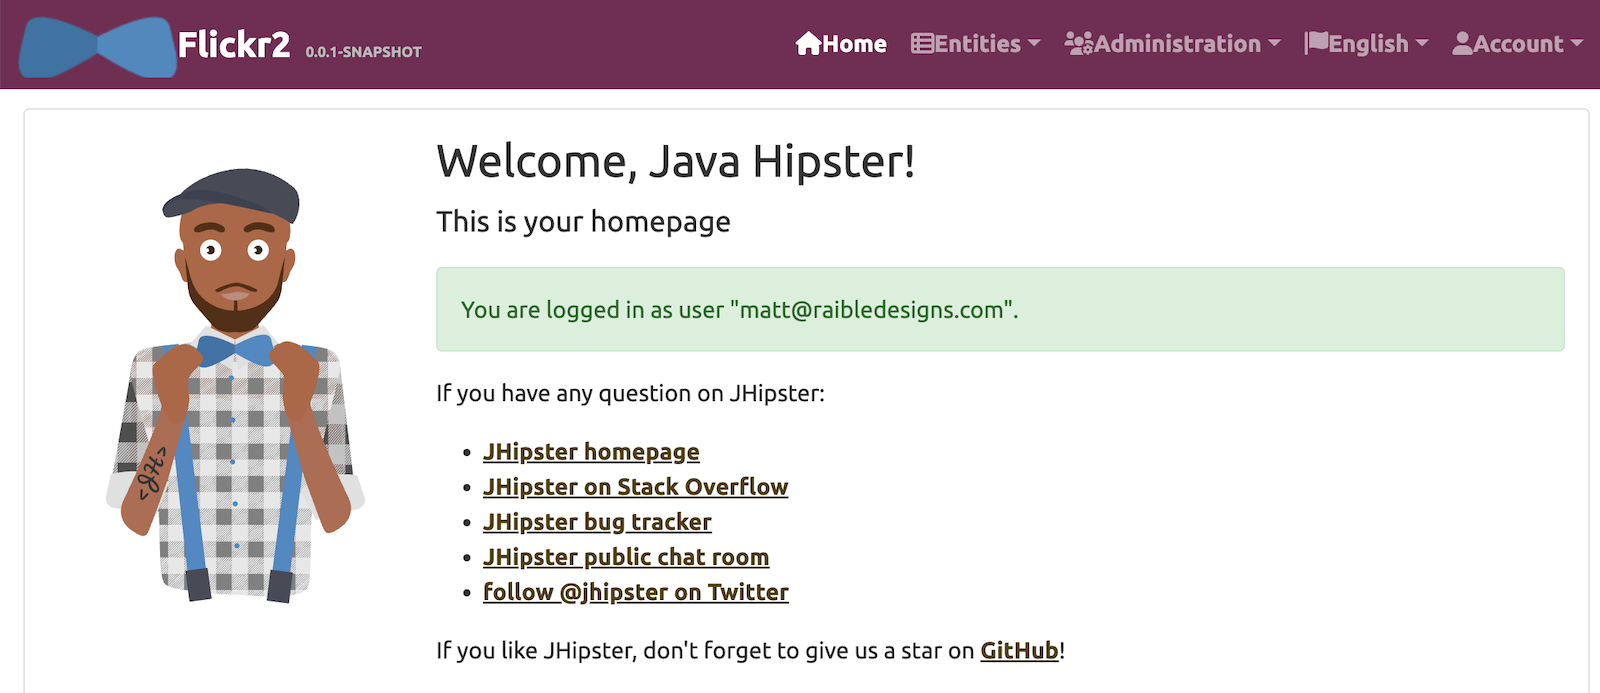
You can see a released version of the artifacts on the auth0-full-stack-java-example’s releases page.
Learn more about CI, JHipster, and GraalVM
I hope you’ve enjoyed this tour of how to configure GitHub Actions to create GraalVM binaries of Java applications. Native binaries start quite a bit faster than JARs, but they take a lot longer to build. That’s why it’s a good idea to farm out those processes to a continuous integration server.
If you liked this tutorial, chances are you’ll like these:
Follow us @oktadev on Twitter and subscribe to our YouTube channel for more modern Java goodness.
Okta Developer Blog Comment Policy
We welcome relevant and respectful comments. Off-topic comments may be removed.