Selecting the Best Authorization for Your API Integrations

Integrating with an API lets you power up your code by knowing what the API knows and doing what the API can do. The catch is that most APIs can’t and shouldn’t let just anybody access your important resources. Just as humans log in to access resources, programs accessing APIs must obtain proper authorization.
Your application can use two types of authorization mechanisms when calling Okta APIs from your Okta integration, each with its pros and cons:
- API Tokens
- OAuth 2.0
Let’s better understand the two types, how they work, and when to use them.
Table of Contents
- API Tokens
- OAuth 2.0 Client Credentials
- Decide which API authorization mechanism to use
- Learn more about connecting to Okta APIs using OAuth Client Credentials
API Tokens
If you’ve connected with APIs before, you’ve probably copied a token and pasted it into the Authorization header of your HTTP request. Token authorization has several notable drawbacks, including when connecting to Okta APIs.
You can create API tokens from the Okta Admin Console. The Admin Console only shows you the token value upon creation, so you’ll need to capture the value and securely persist it in a credentials manager. When you use the API token, you’ll add it to the Authorization header of the call using the proprietary SSWS scheme.
GET /api/v1/groups?limit=10 HTTP/1.1
Authorization: SSWS api_token
Accept: application/json
Host: dev-1234567.okta.com
When an Okta user creates an API token, it has all of the user’s permissions, which are rarely the best choice for an automated workflow. The user represented by the token becomes a single point of failure:
- The automation may break if their permissions are reduced, or the user leaves the organization.
- If the user’s permissions are increased, the automation may silently gain the ability to cause unexpected problems if it has a bug.
All Okta API tokens automatically expire after being unused for 30 days to mitigate the security risks of old tokens falling into the wrong hands. A user can revoke tokens anytime from the Admin Console, and deleting no longer needed tokens is a good idea.
Considerations for using API tokens
It can be tempting to create a service account in Okta and use an API token from the service account, but this approach only moves the underlying problem rather than solving it. Managing access to the service account is complex, and mistakes can cause problems wherever the service account has access. Additionally, if the service account’s token accidentally becomes publicized, anyone who gets the token can impersonate the service account.
When to use API tokens
Due to these constraints, API tokens are never the preferred authorization method for Okta’s APIs. If you’re ever in a situation where you “have to” use API tokens in production because OAuth or a service integration won’t work, we’d love to hear about it! Let us know in the comments below, or discuss the challenges with your Okta representative.
OAuth 2.0 Client Credentials
OAuth has a standard flow for machine-to-machine communication called Client Credentials, the preferred way for processes without user input to communicate to Okta APIs. Using OAuth mechanisms enables you to use a well-known standardized format with fantastic support in libraries, frameworks, and languages of your choice. You can create an API Services application in the Okta Admin Console or use the Okta CLI.
If you haven’t used OAuth Client Credentials before, a quick overview is as follows:
- You’ll create the Okta API Services application and configure the Okta API Scopes you want this application to have. When you make the Okta application, you’ll receive a Client ID and a Client Secret to add to your Okta configuration in your program.
- Your program calls the authorization server’s token endpoint to exchange the Client ID and Client Secret for an access token. The access token contains the Okta API Scopes allowed. There may be Okta SDKs that help support this token call for you, depending on your language and framework.
Note If you have a custom authorization server, such as when using a Okta Developer Edition org, you’ll have to use signed JSON Web Token (JWT) using a JSON Web Key Set (JWKS). Read more about how to do this on the Implement OAuth for Okta developer documentation.
- When you use the access token to call Okta APIs, you’ll add the token to the Authorization header using the
Bearerscheme.
GET /api/v1/groups?limit=10 HTTP/1.1
Authorization: Bearer access_token
Accept: application/json
Host: dev-1234567.okta.com
Considerations with using OAuth
The preferred method is using OAuth to call Okta APIs. It’s more secure, and using widely available standards makes the calling process require less manual code. You’ll configure the scopes you want the process to access, which aren’t tied to a specific user. But you’ll need to get the access token before making the API call.
When to use OAuth authorization
You should use OAuth as the preferred authorization mechanism for communication with Okta APIs, including machine-to-machine communications. A widely accepted industry standard like OAuth affords the most security and scope flexibility.
But, if you create an API Service application in Okta to share it outside of your organization, you delegate the scope configuration to the customer as part of their process of setting up an API Service application. There’s a temptation for potential customers to either allow too much access or, conversely, limit access, causing frustrations that your integration needs fixes to work as intended.
Use API Service Integrations
API Service Integrations powers up your API integration applications using OAuth! Your API Integration becomes more discoverable to potential customers with improved handling for scopes. You can submit your integration to the Okta Integration Network (OIN), which makes your integration available in the OIN catalog. Potential customers can find your integration to add to their Okta org. Plus, as part of the submission process, you define the scopes your integration needs beforehand. Customers can see those scopes in the OIN catalog. Transparency in the required resources will help them feel more comfortable using your integration.
When creating integrations listed in the OIN, you can test your integration as part of the submission process. The OIN Manager provides a mechanism to create a local service app instance in your org to test your integration before you finalize the submission.
Decide which API authorization mechanism to use
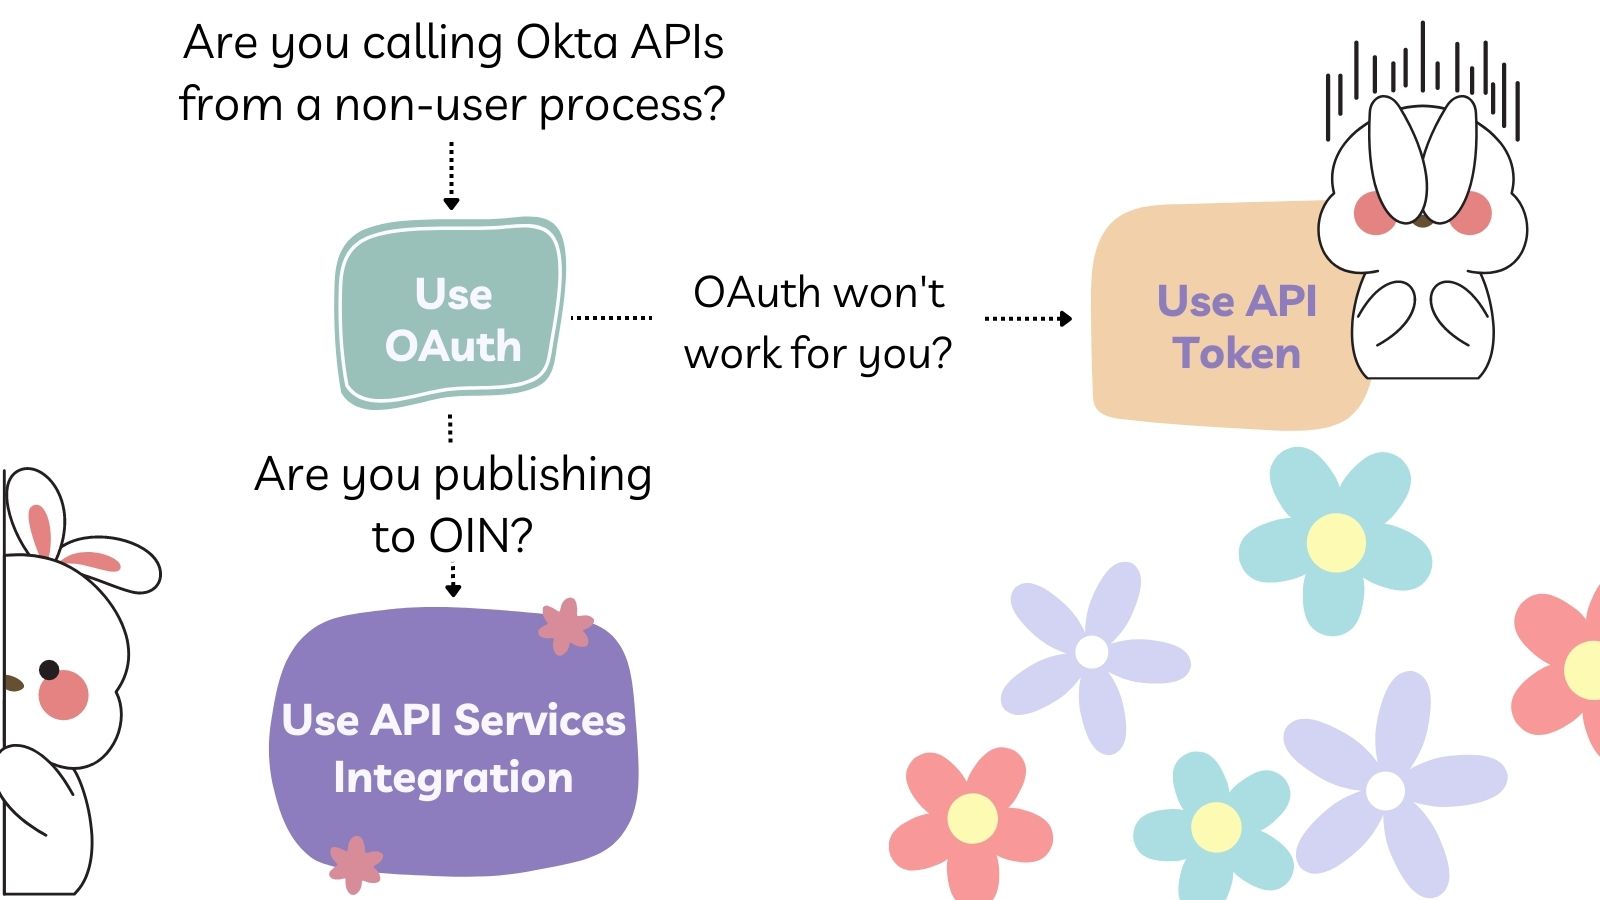
When calling Okta APIs, we recommend using OAuth 2.0, and API Service Integrations if you create an API integration for the OIN. If you have limitations using OAuth 2.0 for your use case, use API Tokens.

Learn more about connecting to Okta APIs using OAuth Client Credentials
API tokens are the simplest, but this simplicity makes them too limited for production applications’ security and reliability needs. OAuth client credentials require more understanding to set up but scale indefinitely for internal use. And for code intended for use by your customers to access their Okta tenant, API Service Integrations built on top of OAuth maximize flexibility and control.
If you found this post interesting, you might find these resources useful:
- Secure Your .NET 6 Web API
- How to Use Client Credentials Flow with Spring Security
- Implement authorization by grant type
- Build an API service integration
- API Integrations in the OIN
Remember to follow us on Twitter and subscribe to our YouTube channel for more great content. We’d also love to hear from you! Please comment below if you have any questions or want to share what topic you’d like to see next. Also, feel free to share your experience connecting to Okta APIs. We want to ensure our developers have the necessary resources and good experience integrating with Okta!
Okta Developer Blog Comment Policy
We welcome relevant and respectful comments. Off-topic comments may be removed.