Building Scalable Laravel Apps with PostgreSQL

Laravel is one of the hottest frameworks for backend and full-stack development of Web applications today. It boasts a large number of quality features out-of-the-box, but it’s still easy to learn the basics. The community is vast, and there are tons of free resources available on the Internet.
This sample application will use Postgres as the backend database system, Okta for user authentication, and Heroku for quick deployment to a scalable platform. Heroku is a Platform-as-a-Service (PaaS) that allows you to get started and go live faster because it handles the underlying infrastructure automatically. It also helps your application grow elastically by managing the available resources according to the load. Heroku is also probably the cheapest option for low-traffic sites – you can’t beat free!
You’ll need PHP, Composer, and Postgres. You will also need an Okta developer account and a Heroku account – you can sign up for free on both sites.
Note: In May 2025, the Okta Integrator Free Plan replaced Okta Developer Edition Accounts, and the Okta CLI was deprecated.
We preserved this post for reference, but the instructions no longer work exactly as written. Replace the Okta CLI commands by manually configuring Okta following the instructions in our Developer Documentation.
Okta For Identity Management
Okta is an API Identity service that allows you to create, edit, and securely store user accounts and user account data, and connect them with one or more applications. We might be biased, but we think Okta makes identity management easier, more secure, and more scalable than what you’re used to.
To complete this tutorial, you’ll need to register for a forever-free developer account.
MySQL and PostgreSQL - Choose the Right Database for Your Project
We just published an overview on the tradeoffs between MySQL and PostgreSQL that covers many of the factors in choosing a database. Check it out for an in-depth review, but here are the highlights:
- Performance - modern versions and engines have created performance parity between the two databases. Performance tradeoffs should not be a deciding factor for most applications.
- Concurrency - PostgreSQL handles concurrency better than MySQL
- Default installation is cleaner with Postgres, and it’s more extensible, supporting more datatypes, operators, and index types
- MySQL is faster for simple, read-heavy workflows and may require less memory to run
- Postgres is a newer technology with a smaller community, but a better commitment to open source than MySQL
We chose Postgres for this tutorial because many of our customers use it for their products.
Bootstrapping a Laravel/Postgres Project with Authentication Scaffolding
Laravel supports Postgres out-of-the-box (although it suggests MySQL in its example configuration). In this section, you’ll start a new Laravel project with the Authentication scaffolding. Then you’ll configure it to use Postgres as a data store.
The tutorial assumes your development environment already has PHP, Composer, and Postgres. If you need help setting up Postgres for your platform, please refer to its documentation.
Start by creating a new Postgres database and granting access to it:
psql
create database laravel;
create user laravel with encrypted password 'laravel';
grant all privileges on database laravel to laravel;
Create a new Laravel project:
composer global require laravel/installer
laravel new okta-laravel-pg-demo && cd okta-laravel-pg-demo
Add the authentication scaffolding and pull the Laravel Socialite and SocialiteProviders/Okta packages (you’ll need these when switching the authentication method from a local database to Okta):
php artisan make:auth
composer require laravel/socialite socialiteproviders/okta
Create an Okta Account and Application
Before you proceed, you need to log into your Okta account (or create a new one for free) and create an OAuth application. You’ll need to get a client ID and a client secret for your application.
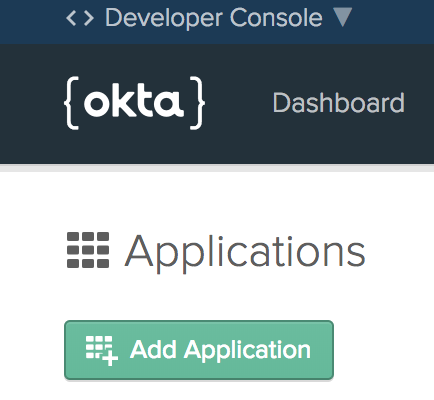
Start by going to the Applications menu item and click the Add Application button:
Select Web and click Next.

Enter a title, and set http://localhost:8000/ as the Initiate Login URI and http://localhost:8000/login/okta/callback as the Login Redirect URI, then click Done. You can leave the rest of the settings as they are.
Copy the Client ID and Client Secret values from the application settings. Go to Api > Authorization Servers, and copy just the host name part of the the Issuer URI field (without the /oauth2/default part) - this is your Okta Base URL (it looks like https:// but the numbers may be different in your case).
Configuring Okta and the Database in Your Application
Edit .env.example, add the following:
OKTA_CLIENT_ID=
OKTA_CLIENT_SECRET=
OKTA_BASE_URL=
OKTA_REDIRECT_URI=http://localhost:8000/login/okta/callback
Edit .env, configure your database, add the Okta keys and input the values you copied in the previous section:
DB_CONNECTION=pgsql
DB_HOST=127.0.0.1
DB_PORT=5432
DB_DATABASE=laravel
DB_USERNAME=laravel
DB_PASSWORD=laravel

OKTA_CLIENT_ID=
OKTA_CLIENT_SECRET=
OKTA_BASE_URL=
OKTA_REDIRECT_URI=http://localhost:8000/login/okta/callback
Before running the database migrations, make some changes:
Delete database/migrations/2014_10_12_100000_create_password_resets_table.php file (you won’t need to handle password resets for your users after switching to Okta authentication).
Replace database/migrations/2014_10_12_000000_create_users_table.php with:
<?php

use Illuminate\Support\Facades\Schema;
use Illuminate\Database\Schema\Blueprint;
use Illuminate\Database\Migrations\Migration;

class CreateUsersTable extends Migration
{
    /**
     * Run the migrations.
     *
     * @return void
     */
    public function up()
    {
        Schema::create('users', function (Blueprint $table) {
            $table->bigIncrements('id');
            $table->string('email')->unique();
            $table->text('token');
            $table->timestamps();
        });
    }

    /**
     * Reverse the migrations.
     *
     * @return void
     */
    public function down()
    {
        Schema::dropIfExists('users');
    }
}
You only need to store an email and a token (both received from Okta after successful authentication) for each user in your database.
It’s necessary to edit the User model as well. Replace app/User.php:
<?php

namespace App;

use Illuminate\Notifications\Notifiable;
use Illuminate\Contracts\Auth\MustVerifyEmail;
use Illuminate\Foundation\Auth\User as Authenticatable;

class User extends Authenticatable
{
    use Notifiable;

    /**
     * The attributes that are mass assignable.
     *
     * @var array
     */
    protected $fillable = [
        'email', 'token'
    ];

}
Run the database migrations:
php artisan migrate
Migration table created successfully.
Migrating: 2014_10_12_000000_create_users_table
Migrated:  2014_10_12_000000_create_users_table
Open psql (the Postgres command-line tool) and confirm there are two tables (migrations and users):
psql laravel
laravel=# \dt
           List of relations
 Schema |    Name    | Type  |  Owner
--------+------------+-------+---------
 public | migrations | table | laravel
 public | users      | table | laravel
(2 rows)

laravel=# \q
Configuring Socialite for Okta Authentication
If you run php artisan serve and load http://localhost:8000/ you should see the default Laravel application with Login / Register links in the top right corner. However, it still uses the local database to authenticate users. In this section, you’ll switch the application to Okta authentication.
Configure the Socialite provider:
Add to the $providers array in config/app.php:
$providers = [
    ...
    \SocialiteProviders\Manager\ServiceProvider::class,
    ...
]
Add to the $listen array in app/Providers/EventServiceProvider.php:
protected $listen = [
    ...
    \SocialiteProviders\Manager\SocialiteWasCalled::class => [
        'SocialiteProviders\\Okta\\OktaExtendSocialite@handle',
    ],
    ...
];
Add to config/services.php:
'okta' => [
    'client_id' => env('OKTA_CLIENT_ID'),
    'client_secret' => env('OKTA_CLIENT_SECRET'),
    'redirect' => env('OKTA_REDIRECT_URI'),
    'base_url' => env('OKTA_BASE_URL')
],
Add to routes/web.php:
Route::get('login/okta', 'Auth\LoginController@redirectToProvider')->name('login-okta');
Route::get('login/okta/callback', 'Auth\LoginController@handleProviderCallback');
Replace app/Http/Controllers/Auth/LoginController.php with:
<?php

namespace App\Http\Controllers\Auth;

use App\User;
use App\Http\Controllers\Controller;
use Illuminate\Support\Facades\Auth;
use Socialite;

class LoginController extends Controller
{
    /**
     * Redirect the user to the GitHub authentication page.
     *
     * @return \Illuminate\Http\Response
     */
    public function redirectToProvider()
    {
        return Socialite::driver('okta')->redirect();
    }

    /**
     * Obtain the user information from GitHub.
     *
     * @return \Illuminate\Http\Response
     */
    public function handleProviderCallback(\Illuminate\Http\Request $request)
    {
        $user = Socialite::driver('okta')->user();

        $email = $user->email;
        $token = $user->token;

        $localUser = User::where('email', $email)->first();

        // create a local user with the email and token from Okta
        if (! $localUser) {
            $localUser = User::create([
                'email' => $email,
                'token' => $token,
            ]);
        } else {

            // if the user already exists, just update the token:
            $localUser->token = $token;
            $localUser->save();
        }

        Auth::login($localUser);

        return redirect('/home');
    }

    public function logout()
    {
        Auth::logout();

        return redirect('/');
    }
}
Modify the section of resources/views/welcome.php that displays the top right menu:
@if (Route::has('login'))
    <div class="top-right links">
        @auth
            <a href="{{ url('/home') }}">Home</a>
        @else
            <a href="{{ url('/login/okta') }}">Log in with Okta</a>
        @endauth
    </div>
@endif
Modify resources/views/layouts/app.blade.php, replace
{{ Auth::user()->name }} with {{ Auth::user()->email }}
Update app/Http/Middleware/Authenticate.php, replace
return route('login'); with return route('login-okta');
Phew, that was a lot of changes! Run the development web server again:
php artisan serve
Load http://localhost:8000. Click Login with Okta and after a successful login you will see the dashboard and the Okta email as your login identifier in the top right corner.
Create a Heroku Account
In the last part of the tutorial, you’ll deploy the application to Heroku. Before proceeding, head straight to Heroku signup and create a new free account.
Install the Heroku command-line interface (CLI), verify the installation and login. Refer to the Heroku documentation on how to do this on your platform (Windows or Linux). Here are the steps for MacOS:
brew tap heroku/brew && brew install heroku
heroku --version
heroku/7.24.3 darwin-x64 node-v11.14.0
heroku login
Then initialize a new heroku app inside your project directory (okta-laravel-pg-demo):
heroku create
Creating app... done, ⬢ warm-bastion-91341
https://warm-bastion-91341.herokuapp.com/ | https://git.heroku.com/warm-bastion-91341.git
The application ID will differ, but make a note of it. It’s a part of the deployment URL of your application (in this example, it’s https://warm-bastion-91341.herokuapp.com/).
Head to Okta, edit your application and replace http://localhost:8000/ with your deployment URL. Using the example above, you would set:
Login redirect URIs: https://warm-bastion-91341.herokuapp.com/login/okta/callback
Initiate login URI: https://warm-bastion-91341.herokuapp.com/
Of course, use your own domain name.
Deploy the Application to Heroku
These deployment instructions are largely based on the Heroku Laravel Guide.
Create a Procfile first to define the correct document root (/public) for your Laravel app:
echo "web: vendor/bin/heroku-php-apache2 public/" > Procfile
The project needs to be a git repo in order to deploy it to Heroku. Initialize a new git repo in this folder, and add all the current files:
git init
git add .
git commit -m "new laravel project"
Then set the Okta keys you want to use (make sure to replace the callback URL with the new heroku deployment URL):
heroku config:set APP_KEY=$(php artisan --no-ansi key:generate --show)
heroku config:set OKTA_CLIENT_ID=<YOUR OKTA CLIENT ID>
heroku config:set OKTA_CLIENT_SECRET=<YOUR OKTA CLIENT SECRET>
heroku config:set OKTA_BASE_URL=<YOUR OKTA BASE URL>
heroku config:set OKTA_REDIRECT_URI=<YOUR HEROKU URL>/login/okta/callback
heroku config:set DB_CONNECTION=pgsql
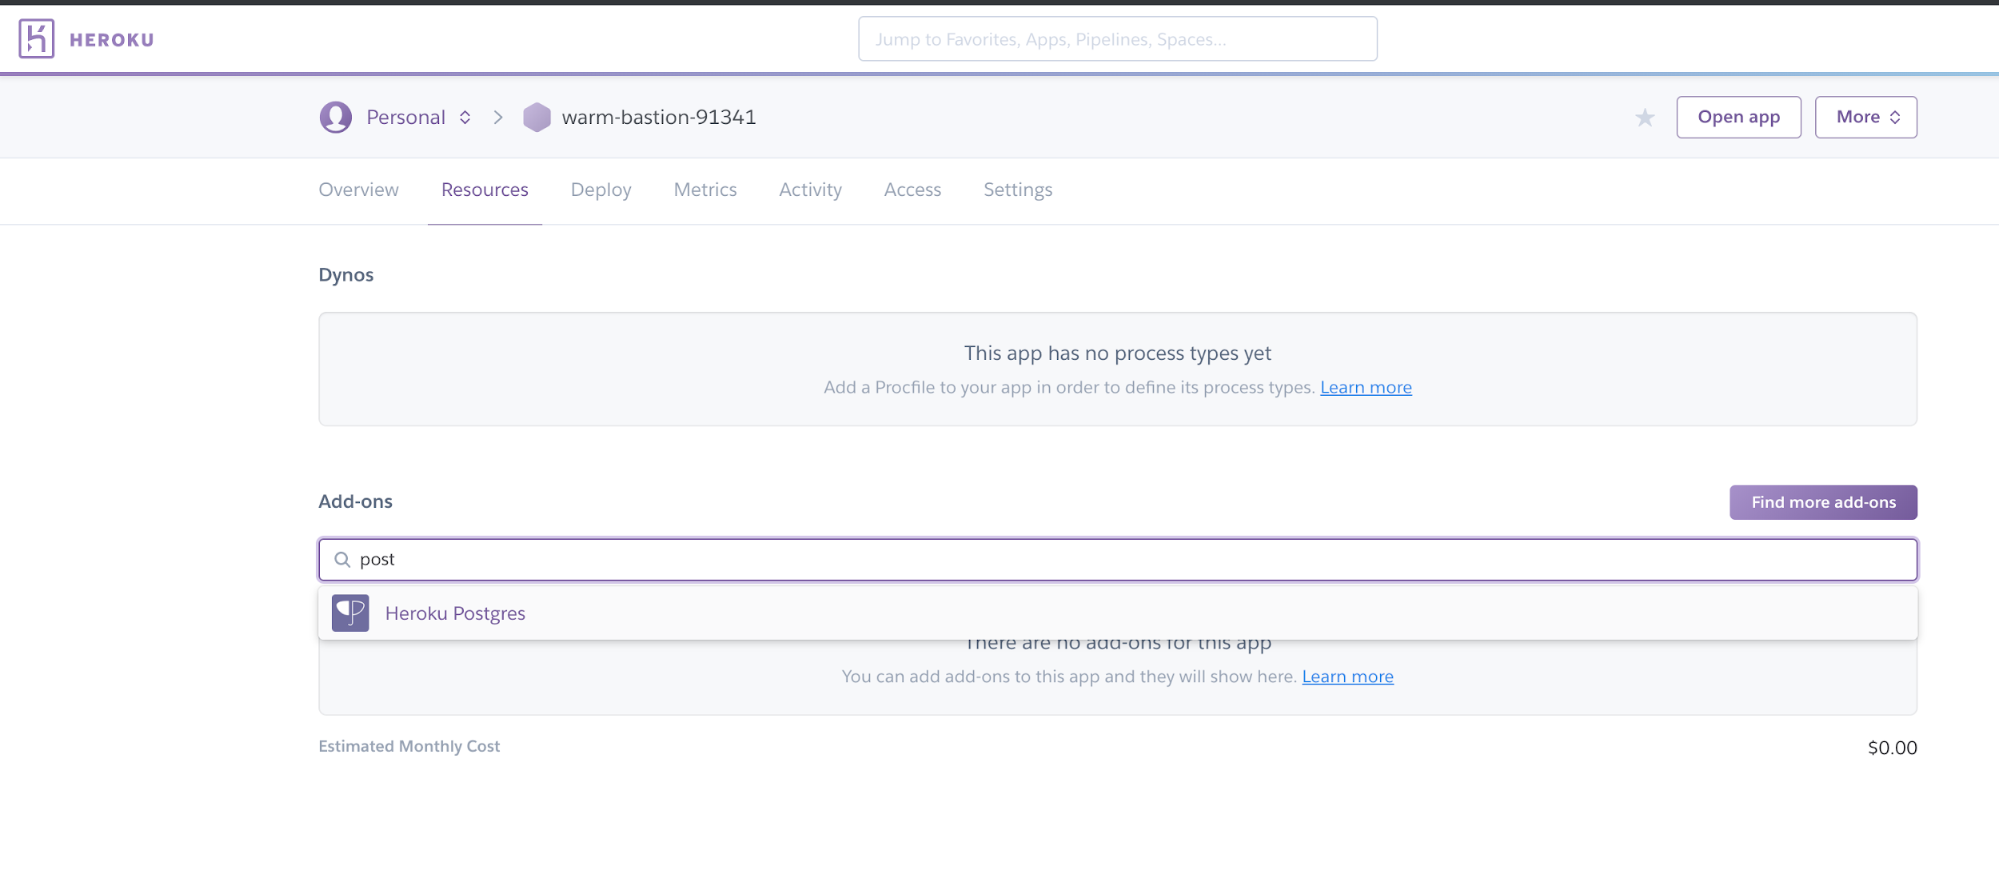
Go to dashboard.heroku.com/apps, then click on your app, click Resources and in the Add-ons section find Postgres:
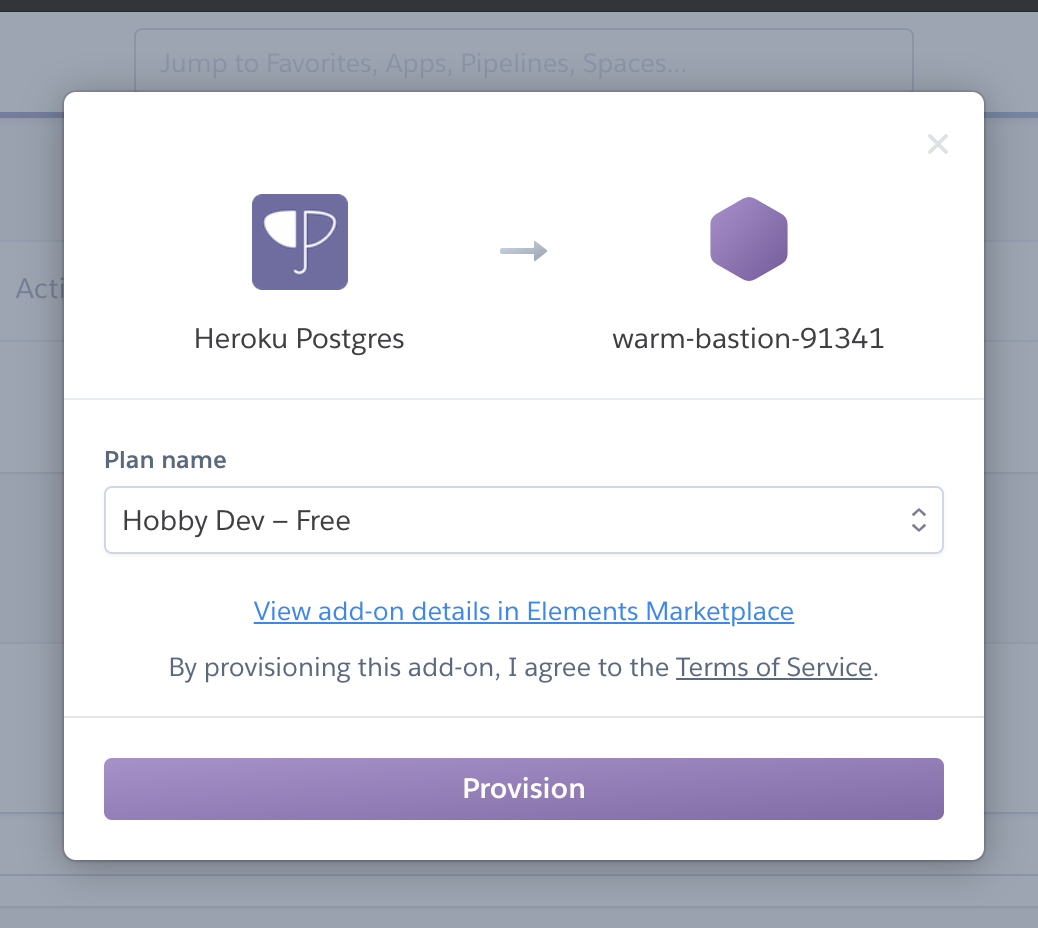
Select the Hobby Dev - Free plan and provision it for your app:
Heroku provides a DATABASE_URL environment variable that you can parse to extract the database credentials. Update config/database.php:
$DATABASE_URL = parse_url(getenv("DATABASE_URL"));

return [
    // ...
    'connections' => [
        // ...
        'pgsql' => [
            'driver' => 'pgsql',
            'host' => env('DB_HOST') ?? $DATABASE_URL["host"],
            'port' => env('DB_PORT') ?? $DATABASE_URL["port"],
            'database' => env('DB_DATABASE') ?? ltrim($DATABASE_URL["path"], "/"),
            'username' => env('DB_USERNAME') ?? $DATABASE_URL["user"],
            'password' => env('DB_PASSWORD') ?? $DATABASE_URL["pass"],
            'charset' => 'utf8',
            'prefix' => '',
            'schema' => 'public',
            'sslmode' => 'require',
        ],
        // ...
    ],
    // ...
];
The code uses the DB_... variables if available but if they are not set, it falls back to the DATABASE_URL parsing.
Commit your changes, deploy the application to Heroku and run the database migrations. Finally, open the application:
git commit -am 'updated database config'
git push heroku master
heroku run php artisan migrate
heroku open
The heroku deployment URL should open in a browser and you can test the Okta login. Well done!
Learn More About Laravel, Postgres and Heroku
You can find the completed code example on GitHub.
If you are interested in other Laravel tutorials that build a single-page application and use Okta for authentication (through the implicit flow method), check this series where you can build the same example application with an Angular, React or Vue frontend:
- Build a Basic CRUD App with Laravel and Angular
- Build a Basic CRUD App with Laravel and React
- Build a Basic CRUD App with Laravel and Vue
If you find any issues, please add a comment below, and we’ll do our best to help. If you liked this tutorial, you shouldfollow us on Twitter. We also have a YouTube channel where we publish screencasts and other videos.
Okta Developer Blog Comment Policy
We welcome relevant and respectful comments. Off-topic comments may be removed.